Make Your Own Eco-Bag
You will need:
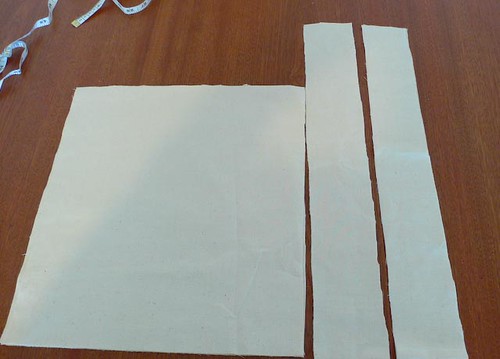
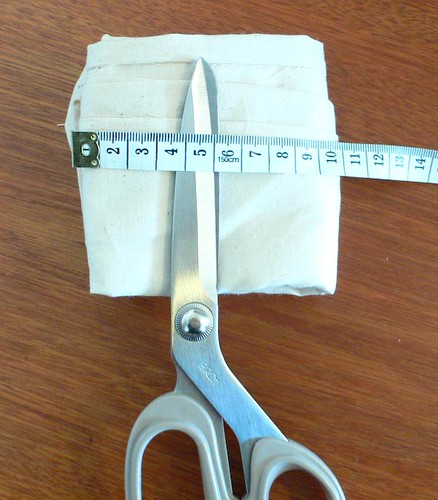
2 panels of material 34 cm x 38 cm (13"x15") for the front and back
2 strips of material 8 cm x 104 cm (3" x 41") for the side panels and handles
thread
sewing machine
stamps
stamp pads
scissors
pins
1. Cut out your bag. You can make the bag bigger if you like but it may not fit into your hand bag if you do that... which is not a problem if you don't want it to!
2. Stamp your images on the front and back panels. I used some Tia Bennet clear stamps to make the Eco-Bag title, and on the other side stamped a rondel stamp I got at Spotlight.

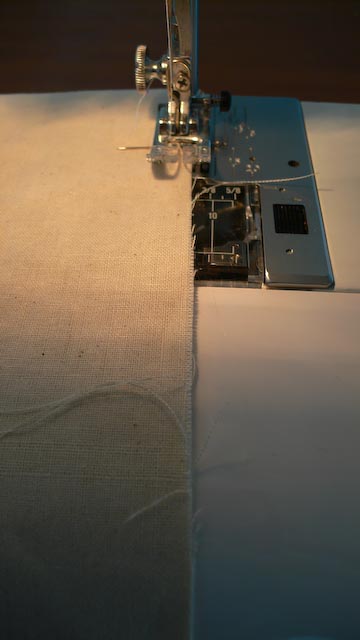
3. Fold down the top of the front panel by 3 mm. Then fold again so the raw edge is inside the hem. Sew the hem. Repeat for the back panel.

4. Take one of the side panels. Fold the strip in half so you have a 8cm x 52 cm side panel. Measure the height of your front panel and mark this on one edge of the side panel.
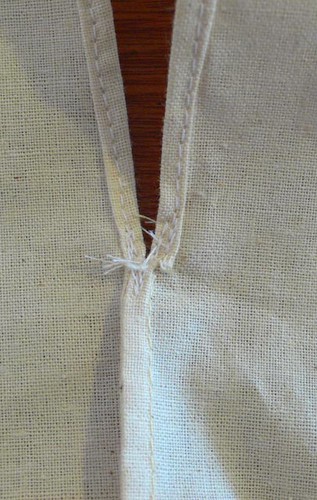
 Sew a french seam down from this mark.
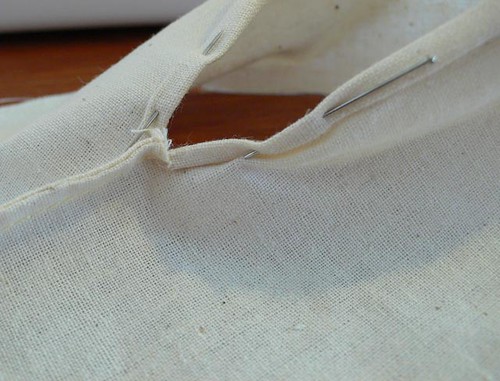
 To sew a french seam, join the wrong sides of the material together and sew. Clip the top of the seam to enable you to make a handle seam. Trim the seam fairly close to the stitches. Then fold the material so the right sides are together and the raw edges are contained inside the fold. Sew again, enclosing the raw edges. See here for better instructions.
I used french seams because they are strong, hard wearing seams. If you want, you could overlock the material and use a triple-stitch running stitch instead.
5. Now make the handle seams. At the clipped mark at the top of your french seam, fold over the edge 3mm, and then fold again.

Or you could make a rolled hem if you wish. Pin and sew the first edge of the handle seam.
6. Reinforce the base of handle by running a V shaped stitch line back and forth from the handle to the french seam.
7. Repeat the folded/rolled hem for the other side. You will have to clip a little to enable you to make the folds on this side.

8. Take the other side panel and repeat steps 4-7.
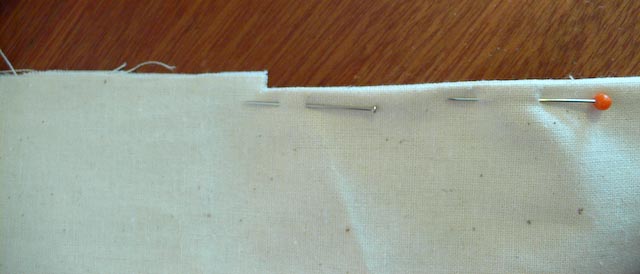
9. Now join the side panels to the front and back panels. Again, I've used a french seam for these seams as well. The photo shows the side panel pinned to the front panel to begin sewing.

10. After sewing those 4 seams, you are ready to make the bottom hem. Fold the side panels inside the bag and line up the edges of the front/back panels.
 Pin and sew.
Trim the raw edge back close to the stitching line.
11. Fold the bag inside out and make sure the side panels are sitting nice and flat. Finish the french seam by sewing along the bottom edge, enclosing the raw edges. Turn the bag the right way out and voila! A finished bag.

I can fold mine up to about 10cm square.
I can vouch that this is a GREAT bag. I love mine!
ReplyDeletePenny, I didn't realize you stamped the letters. So creative!
You should definitely enter this in the make-it-from-scratch carnival.
ooh, great tutorial, thank you! This looks like the perfect size bag for just throwing those random little things in, but also strong enough for groceries. What is a rondel stamp? It sure looks fun!
ReplyDeleteWow. I love sewing and am soooo jealous that you can find time to do it. Isn't it sew relaxing?
ReplyDeleteOK, now I really have to pick up the eco-bags that have been popping up all over the supermarkets in town. I've actually been considering it for awhile, but I am decidedly too scatterbrained to remember to bring them with me when I go shopping! Ha!
great idea Penny and I wonder if you could make this as a little side business.....it looks fab....
ReplyDeleteHad a read of your other posts, oh the beach day out looked fab, lol at dd though.
I loved blue smoke and fire. I am a huge deborah Challinor fan and only just finished reading Kitty, am off to get my hands on her book Amber next.
Love the photo that Dh took of you and awww you were pretty at 17.
Ames - the rondel stamp is a stamp with a picture of a fancy circular scrolly thing that I call a rondel. I might be incorrect in my terminology though ;-)
ReplyDeleteKristin - I have entered this in the MIFS carnival :) I finally figured LOL!
......... I used to be a great sewer, but now I can only stitch paper!!
ReplyDeleteBut I promise I will take my purchased shoppig bag out of the boot to do my bit!!:))
this is a great tutorial:) I just bought a sewing machine, so I am excited to try these out!!
ReplyDeleteMy SIL made me some shopping bags out of old jeans. I love them. What a fun stamp on yours! Great project. Welcome to MIFS!
ReplyDeleteI love all eco bags. Thanks for sharing this wonderful project and a cool MIFS item.
ReplyDeleteCindy
www.myrecycledbags.com
Penny, i love this bag - the lettering is wicked awesome!
ReplyDeleteThat is a wonderful tute for an eco bag. I really like the Eco Bag lettering you did on your bag. Very cool-looking!
ReplyDelete